Design Spot: Inspiration Comes Standard Below you will find links to all of my design projects. I think I could almost rename this the "Fad" spot. Here you will find what has been inspiring me lately.
My hope is that you catch some inspiration from it. Mostly, I want you to know: You Can Do It. Like Annie in Annie Get Your Gun, I hope you can sing, "Anything you can do, I can do better! I can do anything better than you." That attitude has been my motivation for countless projects. I hope it's catchy, and hope it gives you motivation. Feel free to do it better, because I'm sure you CAN. ;) |
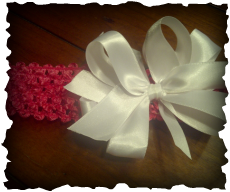
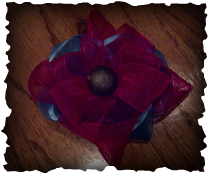
Stack Bow HeadbandCreate a beautiful bow and headband for under $1. An easy step by step for bow making.
|
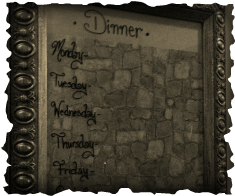
Menu BoardA quick trick for an old pic. Transform an unwanted picture to a menu board in minutes.
|
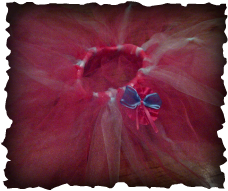
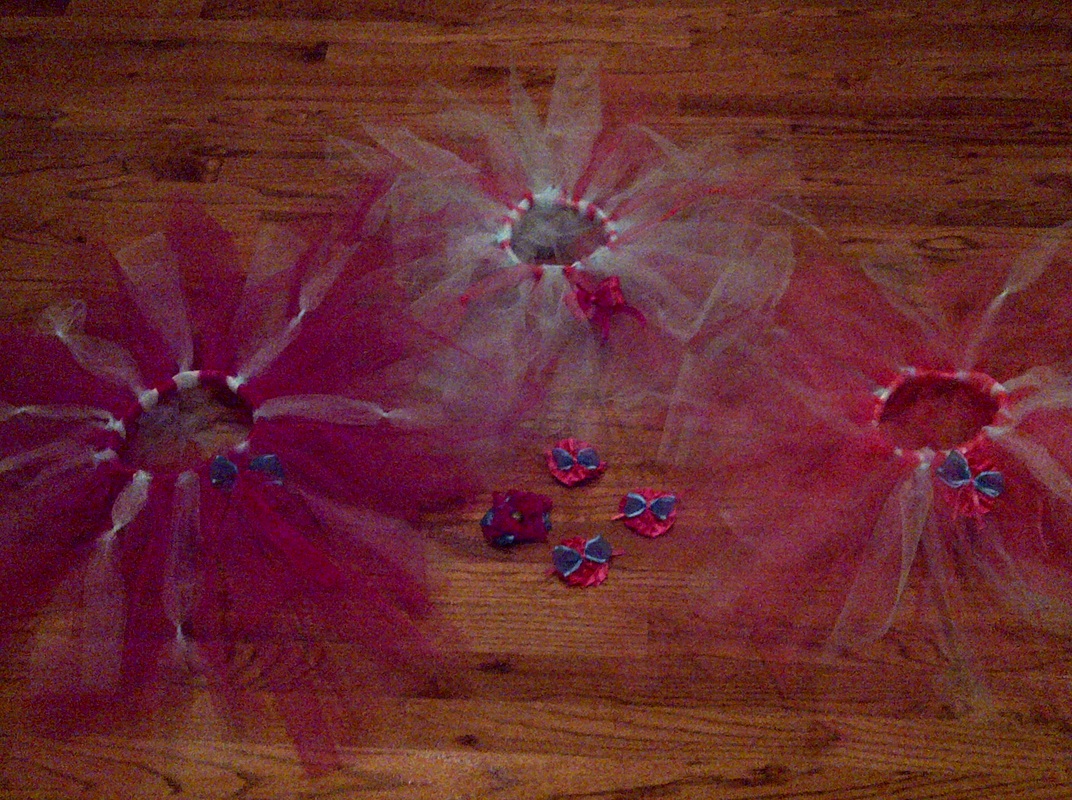
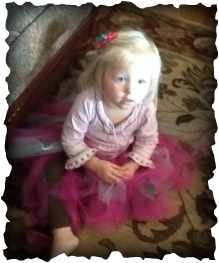
3 Princesses DIYCreate 3 Tutus and 3 Bows for under $20. Plus, some great pictures of my girls wearing them.
|
Here is an example of one of my favorite design projects:
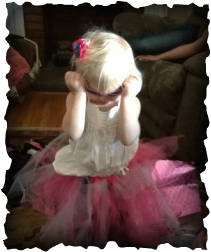
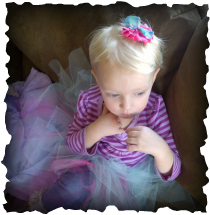
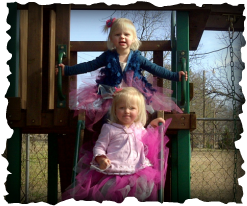
3 Princesses DIY Project for under 20$.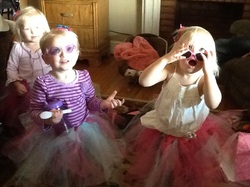
I have wanted to try to make my daughters a few bows and tutus for a while. In yesterday's trip to Walmart with my 3 year old, 2 year old, and 3 months old, I actually did the WHOLE circle! I even got to the craft department. I got brave and bought stuff to dress up 3 princesses. It was WELL worth the effort. See below for the step by step. This was my FIRST time ever doing this. =)
Step 1: Supplies (makes 3 bows and 3 tutus)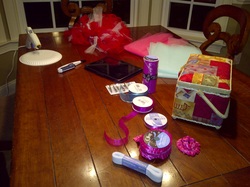
Step 2: Make the bow clips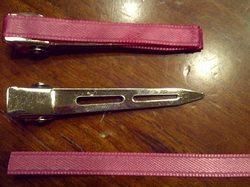
Hot glue the thinnest ribbon around the alligator clips.
Step 3: Make the ribbon flower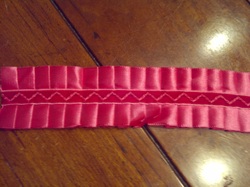
I started with 4 1/2" of the 1 1/2" ribbon.
Use the lighter gently on the end of the ribbon to prevent fraying. Thread the needle and knot the end of the thread. Stitch in and out of the ribbon about and eighth of an inch away from the side. 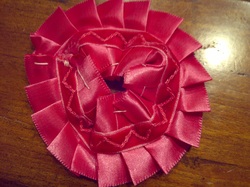
The stiches should be very loose. (about 1/2 in between each)
When you reach the end of your ribbon, pull the loose stitches tight, and the ribbon will curve into a circle. 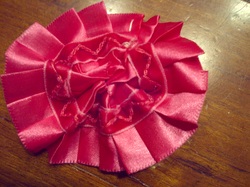
Pull the thread even tighter, and the whole in the center should fill completely.
Then, thread the needle up and down through the center of the ribbon until you feel it is secure. Knot it and cut off the extra. I ended up putting a little stitch where the 2 ends meet to keep it looking tidy. Step 4: Make the smaller bow for the center
Cut a 3 1/2" piece of the 1" ribbon.
Cut a 3 1/2" piece of the thin ribbon. Use a lighter on the ends to prevent fraying. Take the 1" ribbon and fold it half to find the center. Put a threaded, knotted needle through the center. (do not lift the ribbon off the needle yet) Fold one end down onto the needle, and repeat with the other side. Pull the needle through to the knot. 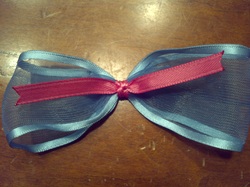
From the center, go around the top of the bow, underneath and bring the needle back up through the center.
From the center, go around the bottom of the bow, underneath and bring the needle back up through the center. Wrapp the remaining thread around a few times tightly. Knot. Tie the thin ribbon around the center over the knot. Step 5: Assemble the 3 pieces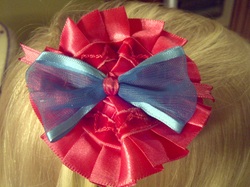
With needle and thread sew the bow onto the ribbon flower. (you could use the hot glue gun if you prefer)
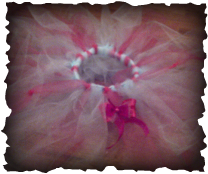
Hot Glue the assembled bow onto the alligator clip. Enjoy! If you stuggled with my instructions the following website was helpful for making bows. Step 6: Make the tutus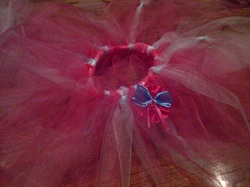
|

Luke 10:21
21 At that time Jesus, full of joy through the Holy Spirit, said, “I praise you, Father, Lord of heaven and earth, because you have hidden these things from the wise and learned, and revealed them to little children. Yes, Father, for this is what you were pleased to do. (NIV) 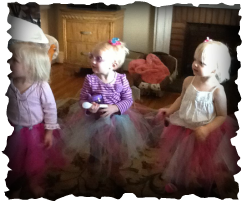
Romans 8:17
17 Now if we are children, then we are heirs—heirs of God and co-heirs with Christ, if indeed we share in his sufferings in order that we may also share in his glory. (NIV) Heir of a king= Princess
The bow pictured above I made with the extra ribbon for my baby. It attaches to a headband. Click the "making bows" link and use the 'flower loop bow' with a 'twisted boutique bow' tutorials.
|
